 Just for the sake of completeness.
Monday, November 8, 2010
Extension Chimney
 This one looks more like a chimney. It was not very well constructed originally but they did see the need for a bigger flue. Both this one and the south one were full of debris, the middle one was clear, perhaps the middle one was used after the railroad era?
Flashing will cover much of the base when the shingle roof is installed.
Thursday, November 4, 2010
Chimney complete, nearly
South Chimney
Thursday, October 21, 2010
Roof detail
 The original trim has been removed and a wood fillet put in. This will allow the roofer a straight edge to work from. The original roof was nailed initially into the trim. Not such a good idea and not something sold enough after 130 years to be done again.
I chose this photograph because of the bird.
North Extension Chimney
New Chimney
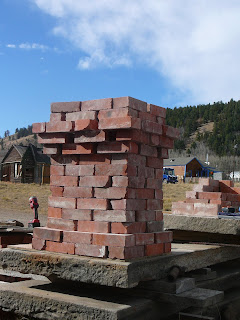
 Bob, for scale purposes, next to our dry stack of the Addition Chimney. This was nearly square as opposed to the other two which are more rectangular. The base came above the ridge line, then returned to 2x2.5, then flared out for 3 rows with 2 rows on top.
The actual build will be slightly higher due to mortar joints. We will put a removable cap on painted black to keep the water out.
Freight Room Chimney
Brick sample
 One of the requirements for the mason is to build a sample wall with the mortar mix and finish.
This looks very white, but it is the original colour, grime of ages has changed the top layer, as will it change this.
Unsurprisingly the chimney in the extension was built to the same standards as the extension, not very good. So the finish on the joints here will be a little rougher.
Chimneys
Saturday, September 11, 2010
Wednesday, September 1, 2010
Supports underneath
Roof work
Paint
East Side, North Extension
Pad Supports for North Extension
 The extension that forms part of the L extended over lower levels. The original wooden supports went into the groud. The part in contact with the dirt had rotted away over the 130 years. The wood is much better quality than can be obtained now so will be reused but this time onto a concrete pad support.
North West Corner Support
Tuesday, August 24, 2010
Men at Work
Battery Room?

 These two photographs show the small room behind the Agents Office. Whilst we can not be certain, the 'waxed' paper and battery terminals suggest that this was used for the storage of the batteries used to power the telegraph. The power output of batteries at the time was very low, so they needed a lot of them, possible 100. They would have looked like mason jars filled with acid and a cathode and anode.
Tuesday, August 17, 2010
Historical Photographs
Summer 2008
Subscribe to:
Posts (Atom)


